
Maria is a Content Writer with a keen interest in Technology and Productivity Tools. Her articles can be found on sites such as Onlinetivity and Delesign. Outside of work, you can find her mini-blogging about her life on social media. Learn about our Tech Review Board
Updated July 5, 2024 Reviewed & Updated by Atish RajasekharanAtish is a seasoned tech enthusiast fueled by caffeine and a Computer Science engineering degree. He stumbled into the blogging world in 2015 and hasn't looked back. Over 2000+ articles later, his work has been featured on sites like Gizbot, Firstpost, PhoneArena, GSMArena, and IBTimes. At GT, he's your go-to guy for how-tos, invaluable tips, and troubleshooting guides that actually work. He's also an SEO and digital marketing whiz and content strategist, so his tech takes are always on point and ethical. Learn about our Tech Review Board
Note: To share your Microsoft Outlook calendar, you must have a Microsoft 365 or Exchange account.
Step 1: Click on the Start button in the Taskbar, type Outlook, and click Open.
Step 2: On the Outlook page, click on the Calendar icon to view your calendar settings.
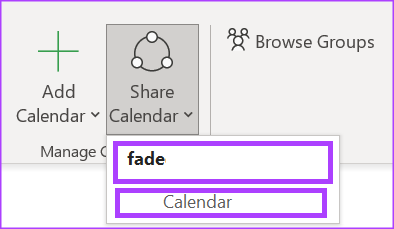
Step 3: On the Ribbon, select the Share Calendar within the Manage Calendars group.

Step 4: Choose the calendar you want to share from the drop-down menu.
Step 5: From the Calendar Properties dialog box, click Add to launch your Address Book.
Step 6: From the address book, select or enter the email address of the user with whom you would like to share your calendar, and click OK.
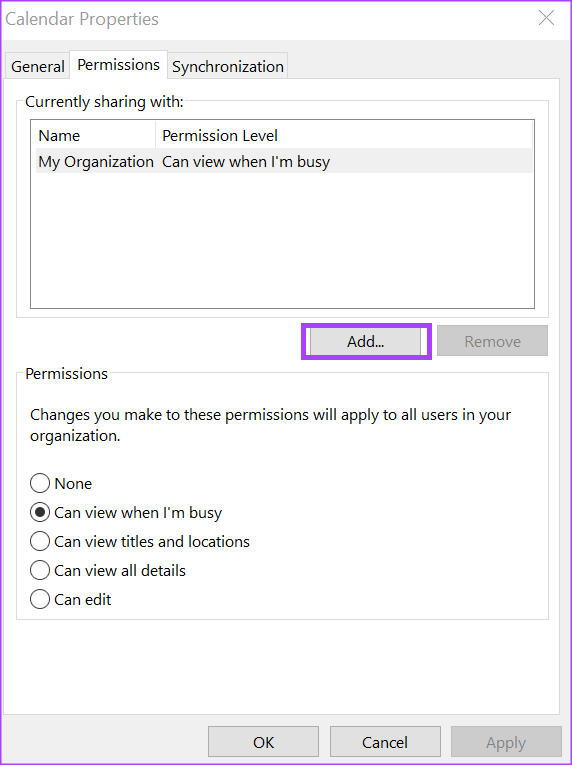
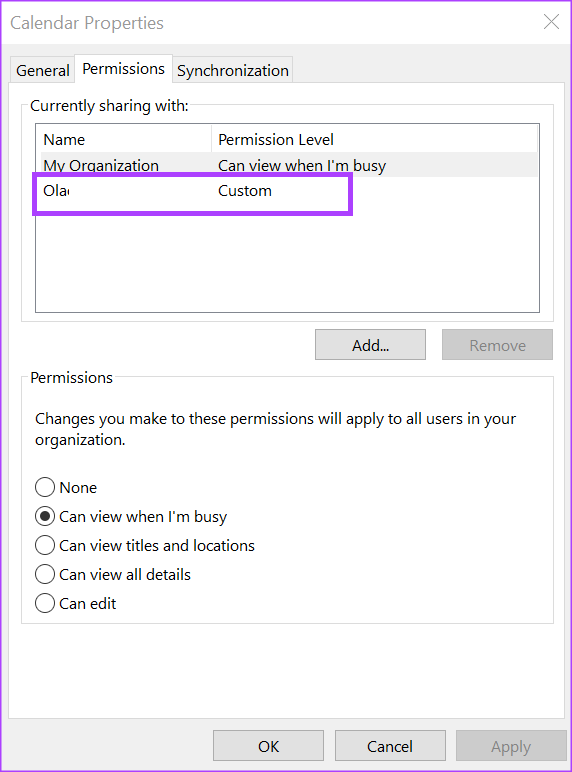
Step 7: In the Calendar Properties dialog box, the name of the calendar recipient should show. Select the type of permissions you would like them to have with your calendar from the following:
Step 9: Click Apply and OK to save your changes.
The person you share your calendar with will receive an email with the sharing invitation. All they need to do is click on Accept to view your shared calendar in their calendar list.
When you make someone a delegate on your Microsoft Outlook calendar, they can send calendar invites on your behalf. They can also read your meeting requests and respond.
Step 1: Open Microsoft Outlook and click on the File tab.

Step 2: Click on Account Settings.
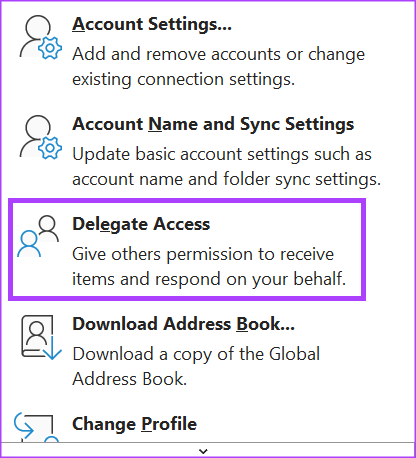
Step 3: From the drop-down options, select Delegate Access.
Step 4: Click on Add in the Delegates dialog box to launch your Address Book.

Step 5: From the address book, select or enter the email address of the user with whom you would like to share your calendar, and click on OK.
Step 6: On the Delegate Permissions dialog box for the selected user, select the type of Calendar permissions you would like the delegate to have from the following options:

Step 7: To send a message to notify the delegate of the changed permissions, check the box for Automatically send a message to delegate summarizing these permissions check box.

Step 8: Click OK to close the dialog box after selecting your permissions.
Step 1: On the Outlook page, click on the Calendar icon to view your calendar settings.
Step 2: On the Ribbon, select the Share Calendar icon.
Step 3: Choose the calendar you want to stop sharing from the drop-down menu.
Step 4: From the Calendar Properties dialog box, click the name of the user with whom you would like to stop sharing your calendar.
Step 5: Click on Remove.
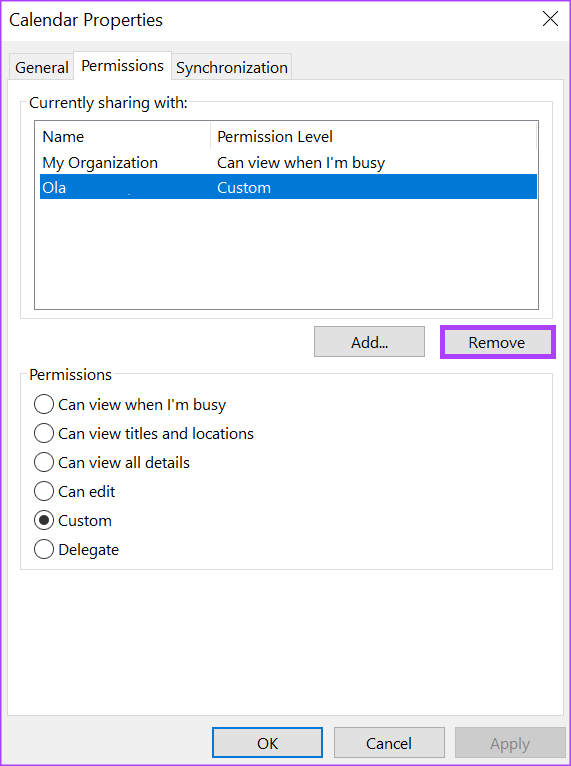
Step 6: Finally, click on OK to close the dialog box with your new changes.
If you use Google Calendar, you can also sync it with your Outlook Calendar . This gives you a comprehensive view of all your upcoming events and appointments.